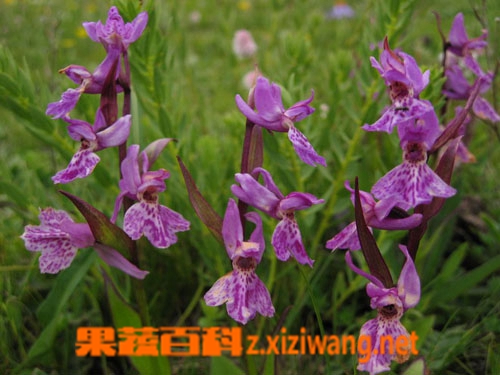
预留广告位
预留广告位
预留广告位
当前位置:首页  »  科技  »  科技百科  »  视频  »  nginx反向代理配置

nginx反向代理配置

来源:网络 转载:好巧合 时间:2022-01-22 19:42
导读nginx反向代理配置,为您提供nginx反向代理配置视频及对应图文信息,配置nginx的反向代理先运行yum install -y nginx安装nginx,再编辑vim /etc/nginx/nginx.conf,加入proxy_pass来配置反向代理。

产品型号:Thinkpad E15

系统版本:centos8

nginx反向代理配置

安装nginx服务

[root@xuegod63 ~]# yum install -y epel-release  #安装yum扩展源,扩展源中有nginx安装包

[root@xuegod63 ~]# yum install -y nginx

我们可以通过 proxy_pass 来配置反向代理

[root@xuegod63 ~]# vim /etc/nginx/nginx.conf

改:

47         location / {

48         }

为:

47         location / {

48             proxy_pass http://www.163.com;

49         }

[root@xuegod63 ~]# systemctl start nginx

查看IP地址

[root@xuegod63 ~]# ifconfig ens33

ens33: flags=4163

        inet 192.168.1.63  netmask 255.255.255.0  broadcast 192.168.1.255

访问web服务:http://192.168.1.63/

当我们访问192.168.1.63,就直接跳转到163网站了,说明我们配置的反向代理生效了。

总结:

1、安装nginx服务

[root@xuegod63 ~]# yum install -y epel-release  #安装nginx yum源

[root@xuegod63 ~]# yum install -y nginx

2、我们可以通过 proxy_pass 来配置反向代理

[root@xuegod63 ~]# vim /etc/nginx/nginx.conf

改:

47         location / {

48         }

为:

47         location / {

48             proxy_pass http://www.163.com;

49         }

声明:本网页内容旨在传播知识,若有侵权等问题请及时与本网联系,我们将在第一时间删除处理。

预留广告位
Top